What if the rubbing alcohol you use to sanitize your tech is actually the fastest way to ruin your favorite pair of earbuds? It’s a common mistake that can lead to degraded seals and muffled drivers. If you’ve noticed a gross buildup of earwax or your volume feels lower than usual, you aren’t alone. Most users struggle with unhygienic grime but hesitate to scrub because they fear permanent water damage.
We understand that you want your audio quality back without the risk of breaking an expensive device. This guide teaches you how to clean your earbuds safely using professional, damage-free techniques that prioritize your acoustic mesh. You’ll learn exactly which tools protect your hardware and why the industry has shifted toward surprising solutions like micellar water for the latest 2026 models.
We’ll compare the official 2026 cleaning protocols from Apple, Samsung, and Sony to ensure you’re using the right method for your specific brand. From $11 multi-tool kits to simple household items, you’re about to get the definitive checklist for restored sound clarity and total hygiene.
Key Takeaways
- Learn how unhygienic buildup directly impacts your sound quality and how to prevent common ear irritations through regular maintenance.
- Identify the specific tools, like soft-bristled brushes and 70% isopropyl alcohol, that are safe for electronics and won’t damage delicate components.
- Discover the step-by-step professional method for how to clean your earbuds safely without risking water damage to the speaker mesh.
- Understand why a clean charging case is just as important as the buds themselves for maintaining battery life and reliable connectivity.
- Implement a simple “wipe after use” routine to extend the lifespan of your tech and keep your audio sounding pristine for years.
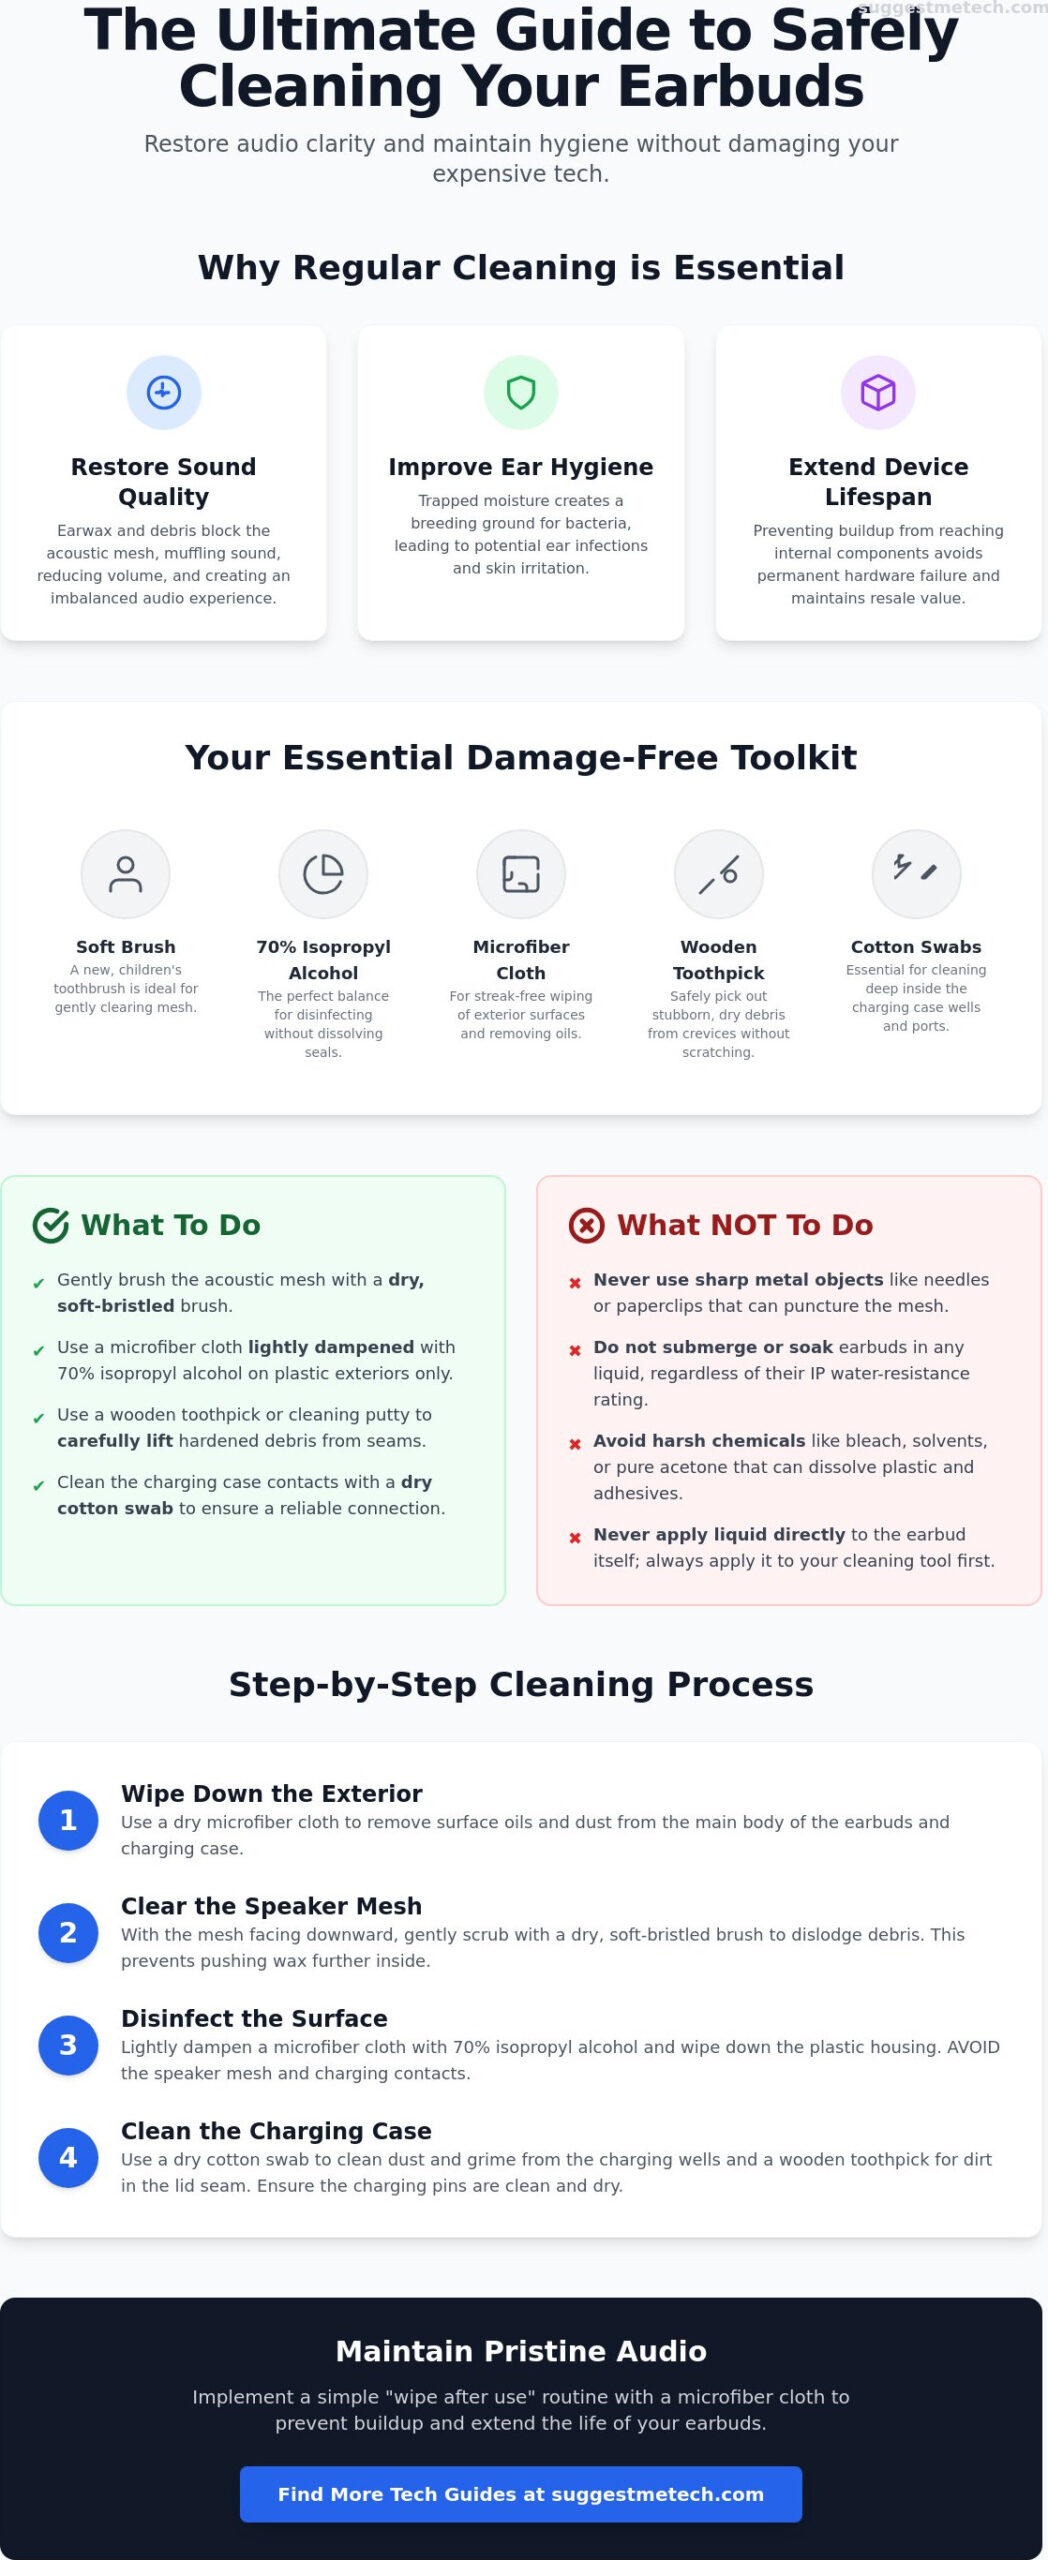
Why Regular Cleaning is Essential for Your Ears and Audio
You likely spent a significant amount on your earbuds for their high-fidelity sound and sleek design. However, skipping maintenance turns that investment into a breeding ground for bacteria and a barrier to acoustic clarity. Understanding how to clean your earbuds safely starts with recognizing that earwax is more than just a cosmetic issue. It’s a dense, sticky substance that actively absorbs sound waves. When wax settles into the tiny holes of your earbud’s speaker mesh, it acts as a physical mute button, stripping away the crisp highs and deep bass you paid for.
Beyond audio quality, there’s a critical health component. Earbuds sit deep in the ear canal, creating a sealed, warm environment where moisture and bacteria thrive. Failing to maintain proper ear hygiene and care can lead to painful outer ear infections or persistent skin irritation. Regular cleaning also ensures the longevity of your device. If wax is allowed to accumulate, it can eventually migrate past the mesh and into the delicate internal driver components, leading to permanent hardware failure that no amount of scrubbing can fix. Finally, there’s the simple factor of visual appeal. Premium tech should look the part. Keeping your earbuds free of yellowing buildup ensures they look as professional and clean as the day you unboxed them.
The Science of Muffled Sound
Every earbud uses a fine acoustic mesh to protect the speaker while letting sound pass through. When earwax fills these microscopic gaps, it creates an uneven barrier. This often results in a frustrating imbalanced sound where one earbud feels quieter than the other. Many users try to fix this by cranking up the volume, but this is a dangerous habit. Increasing the decibel level to overcome a physical blockage can lead to long-term hearing damage, as you’re essentially forcing high-pressure sound against a clogged filter.
What NOT to Do: Common Cleaning Mistakes
It’s tempting to grab the nearest sharp object to dig out a stubborn piece of grime. However, using needles, safety pins, or paperclips is a recipe for disaster. These metal points can easily puncture the fragile mesh, exposing the internal electronics to future debris. Similarly, don’t be fooled by “water-resistant” ratings. An IPX7 rating doesn’t mean your buds can handle a soak in a bowl of water; it’s meant for rain and sweat. Finally, steer clear of harsh chemicals. Bleach, pure acetone, or industrial solvents can melt the plastic housing and dissolve the adhesives holding your earbuds together. Learning how to clean your earbuds safely means choosing tools that respect the materials of your tech.
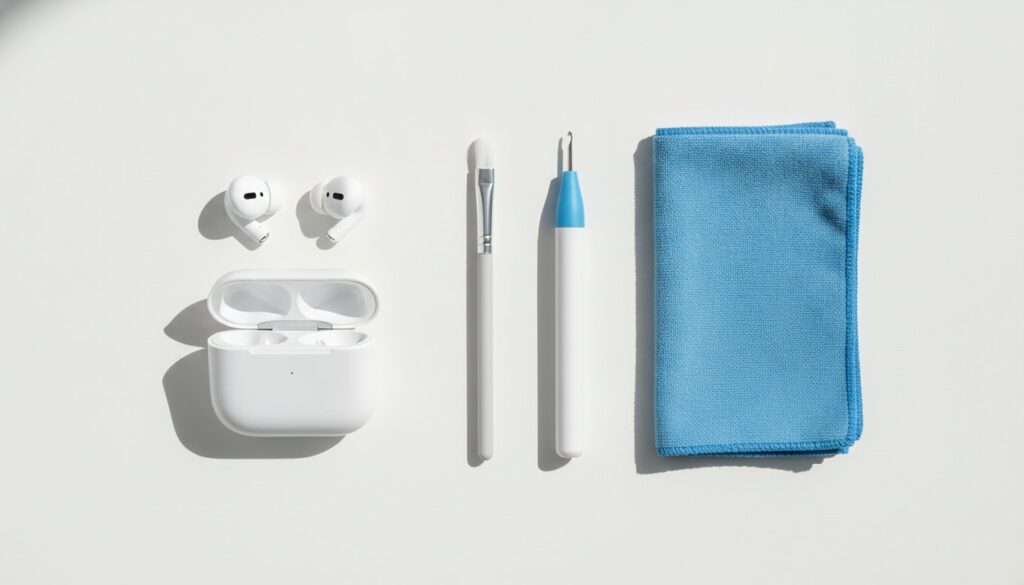
Essential Tools for Cleaning Earbuds Without Damaging Them
Before you begin the physical process, you need a curated toolkit. Using the wrong items is the primary cause of hardware damage. To learn how to clean your earbuds safely, you must move beyond the generic “old toothbrush” advice and select tools designed for delicate electronics. As of June 2026, the market is flooded with multi-tool cleaning kits that average around $11.68 on sites like Amazon. While these are convenient, you can achieve professional results with a few specific household items.
- Soft-bristled toothbrush: Use a new, dedicated children’s toothbrush. The extra-soft bristles are less likely to snag the acoustic mesh than standard adult versions.
- 70% Isopropyl alcohol: This remains the industry standard for disinfecting the exterior plastic and silicone parts.
- Microfiber cloths: These are essential for smudge-free wiping and removing skin oils from the housing.
- Wooden toothpicks or cleaning putty: These are perfect for lifting dry wax out of seams without the risk of a metal puncture.
- Cotton swabs: These allow you to reach the deep charging wells inside your case where dust often settles.
Why 70% Isopropyl Alcohol is the Gold Standard
The 70% concentration provides the perfect balance between disinfection and evaporation. While 99% alcohol evaporates almost instantly, the 30% water content in a 70% solution allows it to stay on the surface just long enough to break down organic matter and kill bacteria. High-concentration 99% solutions can actually be too aggressive for some modern earbuds, potentially dissolving the adhesive seals that maintain water resistance. Always dampen your tool with the alcohol rather than applying liquid directly to the device. For more detailed reviews on the latest maintenance gear, you can check out our expert tech guides.
Household Alternatives That Actually Work
If you don’t have a dedicated kit, adhesive putty like Blu-Tack is incredibly effective for lifting dry wax out of the mesh. Simply press the putty gently against the speaker grille and pull away; the wax sticks to the putty instead of being pushed deeper into the driver. For those with high-end monitors featuring ultra-fine mesh, a clean, soft makeup brush often provides a gentler touch than a toothbrush. A notable 2026 trend involves using micellar water containing PEG-6 Caprylic/Capric Glycerides. Major manufacturers now recommend this specifically for their newest models to avoid the harshness of traditional solvents on certain port designs.
Step-by-Step: How to Clean Your Earbuds Safely
Executing a proper deep clean requires a methodical approach. You shouldn’t rush the process; rushing often leads to moisture ingress or torn meshes. Follow these five logical steps to restore your hardware without risking a trip to the repair shop. This sequence ensures that you handle the most durable parts first before moving to the sensitive electronics. Learning how to clean your earbuds safely is about managing the transition from “wet” cleaning for accessories to “dry” cleaning for the drivers.
- Step 1: Remove and soak silicone ear tips. Pull the tips off and submerge them in a small bowl of warm, soapy water. Let them sit for five minutes to loosen oils.
- Step 2: Brush the speaker mesh. Use your dedicated soft toothbrush to clear away loose debris while the tips are soaking.
- Step 3: Use adhesive putty for deep-seated wax. Gently press the putty against the mesh to lift out any stubborn particles that the brush couldn’t reach.
- Step 4: Wipe the exterior housing. Use a microfiber cloth slightly dampened with 70% isopropyl alcohol to sanitize the outer plastic surfaces where your fingers touch.
- Step 5: Allow for complete air drying. Lay all components on a clean towel for 15 to 30 minutes. Never reassemble or plug them in while moisture is present.
Cleaning the Delicate Speaker Mesh
The speaker mesh is the most vulnerable part of your device. To protect it, always use the “Gravity Method” by holding the earbud with the mesh facing the floor. This prevents any loosened wax or dust from falling deeper into the acoustic chamber. If you notice the audio is still quiet after a surface clean, the mesh might be permanently stained or the driver itself could be failing. Use a light, outward flicking motion with your brush to pull debris away from the center of the grille rather than pressing down into it.
Dealing with Different Tip Materials
Silicone tips are resilient, but memory foam tips, such as those from Comply, require a different touch. Foam is porous and acts like a sponge; soaking it in water or alcohol will ruin its ability to expand and seal. Instead, wipe foam tips with a dry cloth or replace them every three months. If your tips are torn or permanently discolored, it is better to buy a replacement set than to scrub them aggressively. For those using the latest hardware, our AirPods Pro 2 review covers where to find the best official and third-party replacement tips to maintain a perfect seal. Knowing how to clean your earbuds safely means recognizing when a component is past its prime and needs a fresh start.
Don’t Forget the Case: Cleaning Your Charging Ports and Cables
Cleaning your earbuds is only half the battle. If you place pristine earbuds back into a filthy charging case, you’re immediately reintroducing bacteria and debris to the speaker mesh. Beyond hygiene, a dirty case is the primary reason earbuds fail to charge or sync correctly. Learning how to clean your earbuds safely involves looking beyond the drivers and focusing on the power supply. Small amounts of pocket lint or earwax can settle on the gold-plated charging pins, creating a physical barrier that prevents electricity from flowing.
To maintain the interior, use a dry cotton swab to gently sweep the bottom of the charging wells. Avoid using any liquids inside the case, as the charging pins are directly connected to the internal battery. For the external charging port, whether it’s USB-C or Lightning, a wooden toothpick is the best tool for digging out compacted lint. Don’t forget the charging cable itself. Wiping the cable with a microfiber cloth removes skin oils that can eventually make the plastic brittle or transfer grime back to your hands and case. If you’re looking to upgrade your setup entirely, you can browse our full range of tech maintenance reviews to find the most durable gear available.
- Dry cotton swabs: The safest tool for reaching the deep recesses of the charging wells without applying pressure to the pins.
- Wooden toothpicks: Ideal for clearing out the external charging port without the risk of an electrical short from a metal tool.
- Compressed air: Use short, controlled bursts to clear loose dust from the hinge and lid.
- Microfiber cloth: Essential for removing fingerprints and oils from the case exterior.
Protecting the Charging Pins
The charging pins are the most delicate part of your case. When sweat or moisture from your earbuds meets the electrical current of the pins, it can cause rapid corrosion. This chemical reaction leaves a dark film that permanently blocks charging. Always ensure your earbuds are bone-dry before docking them. If you see dust deep in the wells, use a can of compressed air held at least six inches away. Hold the can upright to prevent liquid propellant from spraying onto the electronics.
External Maintenance
Pocket lint often accumulates in the hinge and the magnetic seal of the lid. This prevents the case from closing fully, which can keep your earbuds “awake” and drain their battery while they’re in your pocket. For a deeper look at keeping all your audio gear in top shape, check out our headphones guide. A clean lid seal ensures the magnets engage properly, keeping your tech protected and fully charged for your next session.
Maintaining Your Tech: How to Keep Your Earbuds Pristine Longer
Prevention is always more effective than a deep clean. Establishing a preventative maintenance routine helps you avoid the thick, hardened wax buildup that eventually requires aggressive scrubbing. Most users wait until their audio sounds muffled before acting, but by then, the debris has often migrated into the internal speaker housing. Learning how to clean your earbuds safely is as much about daily habits as it is about the tools you use. By integrating a few simple checks into your schedule, you can double the lifespan of your hardware and maintain peak acoustic transparency.
Your cleaning schedule should depend on your activity level. Gym-goers and outdoor runners face unique challenges because sweat is acidic. It contains salts and minerals that can degrade silicone seals and corrode charging contacts. If you use your tech during high-intensity workouts, adopt the “Wipe After Every Use” rule. Office-based users might only need a quick inspection every few days, but the goal is the same: stop grime before it settles. Always store your earbuds in their case immediately after use. Leaving them on a desk or tossing them into a bag exposes the mesh to dust and pocket lint that is difficult to remove once it becomes embedded.
- Weekly visual inspection: Spend 60 seconds every Sunday checking the speaker grilles for any new discoloration.
- Immediate storage: Never leave buds outside the case, which protects them from environmental contaminants.
- Moisture check: Always ensure your ears and the buds are dry before docking them to prevent pin corrosion.
The 30-Second Daily Routine
Consistency is the secret to tech longevity. At the end of each day, use a dry microfiber cloth to remove skin oils from the earbud housing. This takes less than 30 seconds but prevents the buildup that leads to permanent staining. Take a quick look at the acoustic mesh to ensure no wax has started to bridge the gaps. This simple habit keeps your audio fidelity sharp and ensures your battery life doesn’t degrade due to poor charging connections. If you find yourself constantly cleaning your gear, it might be a sign that your environment is the issue rather than your habits.
When to Seek Professional Help
Sometimes, even the best cleaning routine isn’t enough. If you’ve followed our guide on how to clean your earbuds safely and still experience imbalanced volume or static, you might be facing an internal hardware failure. Manufacturer cleaning services exist, but they often come with a high price tag that makes a replacement more logical. Signs that your earbuds are beyond saving include a rattling sound in the driver, a battery that won’t hold a charge for more than 30 minutes, or physical cracks in the plastic. While you’re evaluating your audio setup, you might also be looking to refresh your other devices. Check out our guide on the best laptops of 2026 for a comprehensive look at the latest high-performance hardware for every budget.
Enjoy Pristine Sound Every Day
You now have the professional roadmap to maintaining your audio gear without risking hardware damage. By prioritizing the “dry-first” method and sticking to a 30-second daily wipe, you can prevent earwax from ever becoming a permanent barrier to your music. These steps aren’t just about aesthetics; they’re essential for protecting your hearing and ensuring your device charges reliably every time you dock it. Keeping your charging pins clear and your silicone tips sanitized ensures your tech remains as hygienic as it is functional.
Understanding how to clean your earbuds safely gives you the confidence to handle high-end tech like a repair expert. However, if your current pair is showing signs of internal hardware failure or the acoustic mesh is permanently compromised, it might be time for a fresh start. Check out our top-rated headphones of 2026 if your current pair is beyond saving. Our expert guides feature models tested on AirPods, Sony, and Bose designs. These recommendations are safe for all 2026 wireless models and come highly recommended by tech repair experts for their long-term durability.
Take care of your gear, and your favorite playlists will sound exactly as the artists intended. Happy listening!
Frequently Asked Questions
Is it okay to clean my earbuds with alcohol?
You can safely use 70% isopropyl alcohol on the exterior plastic housing and silicone ear tips. However, you must avoid using alcohol on the speaker mesh or charging ports of many modern models. As of 2026, brands like Samsung and Sony explicitly advise against alcohol for these delicate areas, recommending dry brushing or micellar water instead to prevent dissolving internal adhesives.
Can I use a toothpick to remove earwax from my earbuds?
Wooden toothpicks are effective for cleaning the exterior seams and charging case ports, but you should never use them on the speaker mesh. The sharp point can easily puncture the thin acoustic filter. To learn how to clean your earbuds safely, use adhesive putty or a soft-bristled brush to lift wax from the mesh rather than digging into it with sharp objects.
How do I clean my earbuds if they fell in water?
Dry the exterior immediately with a microfiber cloth and avoid placing them in the charging case. Shake the earbuds gently with the mesh facing down to dislodge trapped water. Apple recommends a minimum drying period of two hours before use. Do not use the “rice trick” as small particles can clog the ports; instead, leave them in a well-ventilated area.
What happens if I push earwax into the mesh?
Pushing wax into the mesh creates a physical blockage that muffles audio and reduces volume levels. Once debris moves behind the grille, it’s nearly impossible to remove without professional help. This is why we emphasize the “Gravity Method” where you brush with the mesh facing the floor. Deeply embedded wax can eventually cause permanent driver failure due to trapped moisture.
How often should I clean my earbuds?
Perform a quick dry wipe after every use and a deeper clean every two weeks. If you use them at the gym, daily cleaning is necessary to remove acidic sweat that can corrode charging pins. Regular maintenance prevents wax from hardening, making the process of how to clean your earbuds safely much faster. Consistency is the best way to maintain peak audio fidelity.
Can dirty earbuds cause ear infections?
Dirty earbuds are a common source of outer ear infections and skin irritation. The ear canal is a warm, dark environment where bacteria from unwashed silicone tips can thrive. Cleaning your tips with warm soapy water or 70% isopropyl alcohol kills these pathogens. This habit is especially important if you wear your earbuds for several hours a day or during workouts.
How do I clean the charging port on my earbud case?
Use a wooden toothpick or a dedicated plastic cleaning tool to gently lift out compacted pocket lint. Never use metal objects like needles or paperclips, as these can cause an electrical short or bend the internal pins. A quick blast of compressed air can also clear out loose dust that prevents your charging cable from making a secure and reliable connection.
Why do my earbuds still sound muffled after cleaning?
If sound clarity doesn’t return after cleaning, wax may have migrated behind the mesh or the driver itself might be failing. Sometimes the issue is a software glitch or an improper fit in the ear canal. However, if the audio remains imbalanced or quiet after a thorough external clean, it’s a strong indicator of hardware damage that requires professional repair or a replacement.